cPanel is probably the world's most popular web hosting control panel.
For people that are familiar with it, cPanel makes administrating websites a doddle.
However, for those who haven't seen it before, the learning curve can be quite steep.
In this tutorial, we'll explain the basics you need to know in order to administrate your web hosting account via cPanel on a shared UK cPanel hosting package or cPanel VPS.
1. What is cPanel?
cPanel is a software application, or more accurately, a collection of software scripts and programs, that enables users to administer their account on a web server.
cPanel falls into a category of software application called a server control panel.
The 'c' in cPanel actually stands for 'control'.
The software is designed to make the tasks associated with running a website much easier, such as:
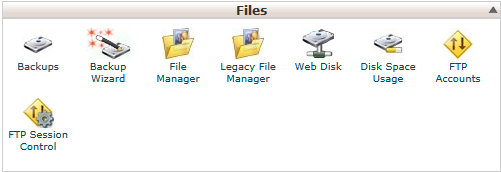
- Browsing Files (Files -> File Manager)
- Adding a domain to the server, e.g. new-domain.com (Domains -> Addon)
- Creating Sub-domains, e.g. subdomain.your-domain.com (Domains -> Sub-domains)
- Creating user accounts for FTP (Files -> FTP Accounts)
- Creating email accounts (Mail -> Email Accounts)
- etc.
Depending on your host and the package you bought, some features in cPanel may have a limit on them or be disabled completely.
For example, you may have a limit on the number of email and FTP accounts that you can create.
All good web hosting companies will place a limit on the amount of disk space you can use.
This protects shared server resources and creates realistic expectations of how far you can go with a shared web hosting account.
2. Logging In
In order to use cPanel you will need an account name and password which is used to gain access to your cPanel account.
Your web hosting company will send you this information when you sign up for an account.
Keep your login details secret and safe from others, as in the wrong hands they can be used to completely remove your website/s, email, etc. from the server and thus, the internet.
Getting to the login page can normally be done in a number of ways; it depends on how the server administrator has set up the server.
Some common ways are:
- https://your-domain.com:2083 (secure, encrypted SSL connection - recommended)
- http://your-domain.com:2082 (unencrypted over normal HTTP)
- https://cpanel.your-domain.com:2083 (secure, encrypted SSL connection)
- http://cpanel.your-domain.com:2082 (unencrypted over normal HTTP)
Where your-domain.com is changed to a domain you have registered with this cPanel account.
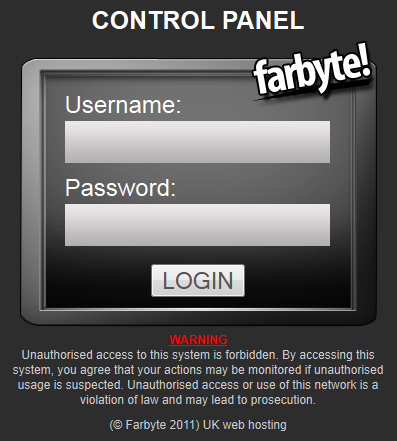
After navigating to one of the pages above you will be presented with a cPanel login screen, asking you for your username and password.
The image below shows the cPanel login screen for Farbyte.com.

3. Creating Your First Website
Your website is, at the very least, a collection of files.
Some more complicated websites use scripts, databases and rich media (video, images, flash).
These assets need to be uploaded to your account and placed in the domain's document root.
Each domain that you register in your cPanel account has a directory on the server called a document root.
This is the location on the file system (disk drive) where you place your domains files (scripts, HTML files, images, videos, etc.).
When you signed up for your cPanel hosting package, you will have supplied either a new or existing domain name to your hosting supplier.
This is your account's default domain.
Its document root is always /public_html/.
So your files for this domain go into that directory.
By default, the web server will allow the public to access any file you place under this directory via their web browser.
So if you placed an HTML file called test.html in your /public_html/ directory, the public could access this file using their web browser by navigating to http://your-domain.com/test.html.
If no file is specified, for example, somebody browses to http://your-domain.com, the web server is configured to search your /public_html/ directory for a predefined file called index.htm.
This file can have a multitude of file extensions depending on the way you want the webserver to process it.
Some common ones are:
- index.php – tells the web server that this file contains PHP script code and, as such, requires processing before sending the resulting output to the user.
- index.html – tells the web server that this is a file containing Hypertext Markup Language (HTML).
Most web servers are case-sensitive when it comes to file names, so always make sure you name your index file in lowercase in order to make sure it works.
It's generally considered good practice to name all your files in lowercase.
To upload your files you can either use the cPanel 'File Manager' (Files -> File Manager) or FTP.
The easiest way to begin with is to use the cPanel File Manager which presents a web browser-based file and folder explorer.
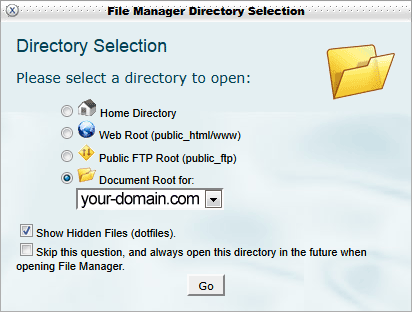
Simply click the File Manager icon when logged into cPanel and you will be asked the location you want to start browsing your files from.

Selecting 'Home Directory' will take you right into the root directory (signified by the / character) of your hosting account.

Under this root directory, you will see a number of files and other directories.
One of which will be called public_html.
There is another directory there called www which points to the same location on disk as /public_html/.
You can use either to access your default document root, it doesn’t matter.
Using the File Manager you can now upload your website's files.

